
Standing Seam Solar Clamp Selection: An Engineering Guide
A standing seam solar clamp should not be selected from the roof type alone.
The starting point is the actual standing seam profile: its geometry, material, thickness, and how the seam is connected to the roof structure. From there, the clamp must be checked for physical compatibility, structural qualification, and suitability for the project loads.
That distinction matters because a clamp can fit a seam and still be unsuitable for the project.
A useful way to think about standing seam clamp selection is:
Compatibility → Qualification → Project Design
| Question | What needs to be established? |
|---|---|
| Compatibility | Can the clamp physically engage the actual seam geometry? |
| Qualification | Is there appropriate test or engineering evidence for this configuration? |
| Project design | Can the complete roof-to-PV load path resist the project design loads? |
The three questions are related, but they are not interchangeable.
1. What Is a Standing Seam Solar Clamp?
A standing seam solar clamp is a roof attachment device used to connect a PV mounting system to a standing seam metal roof without making a conventional penetration through the roof sheet.(You can also refer to : trapezoidal metal roof clamp selection)
In a typical arrangement, the load path is approximately:
PV module → rail → clamp → standing seam → roof panel → roof clips → purlin or structural framing
The exact load path depends on the roof and mounting system.
This is important when evaluating clamp capacity. The clamp is only one part of the connection.
A failure may occur through:
- clamp deformation;
- clamp slip;
- local seam deformation;
- seam opening;
- roof-sheet yielding or damage;
- roof-clip connection;
- fastener or structural connection;
- rail or rail-to-clamp connection;
- supporting structure.
The strongest component in the assembly does not necessarily govern.
2. Start With the Seam, Not the Clamp
“Standing seam roof” describes a roof construction family, not one standardized seam geometry.
Important variables include:
- roof manufacturer;
- panel/profile designation;
- seam width;
- seam height;
- seam shape;
- folded or rolled geometry;
- roof material;
- sheet thickness/gauge;
- coating;
- seam orientation;
- roof clip arrangement.
Two standing seam roofs can look similar from the ground while having significantly different attachment behavior.
For this reason, selecting a clamp from a general statement such as “for standing seam roofs” is not enough.
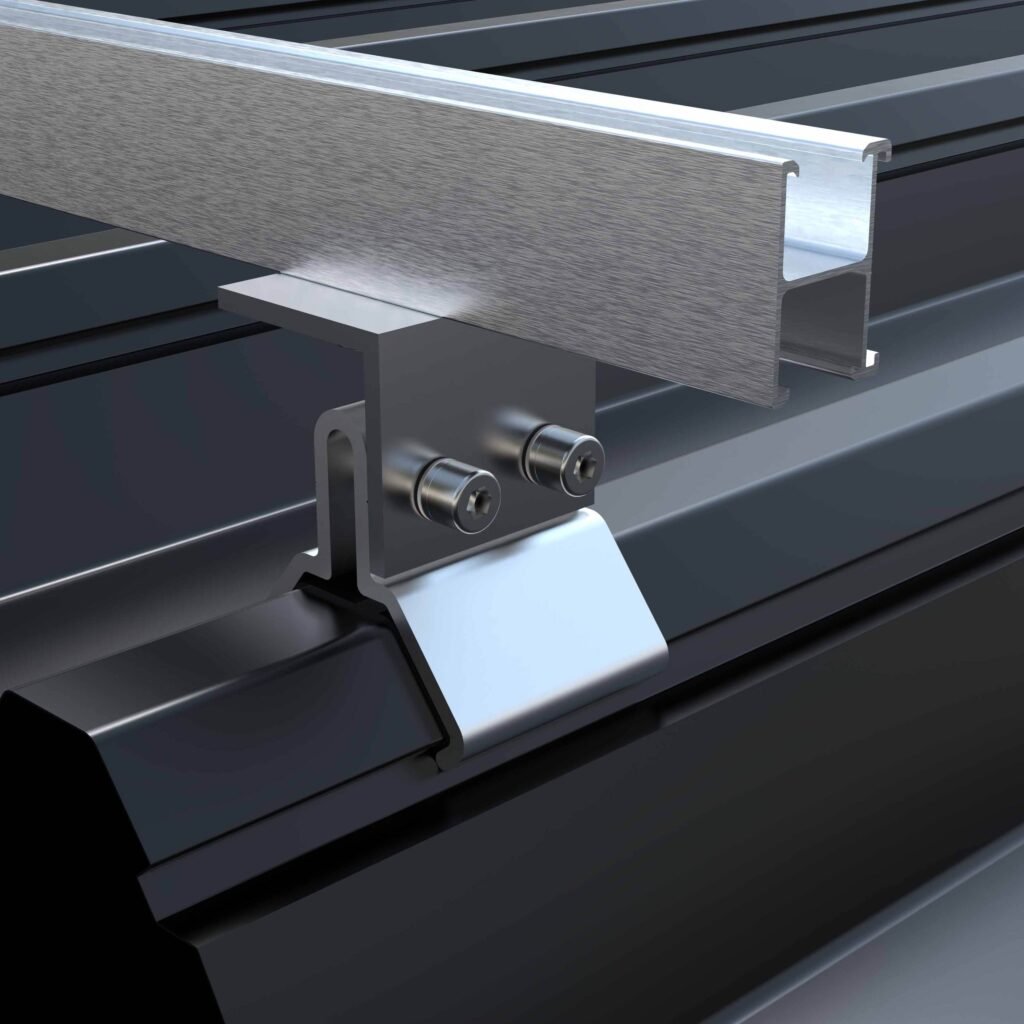
The first compatibility check
Before ordering a clamp, try to establish:
- Who manufactured the roof?
- What is the exact panel/profile?
- What is the seam width and height?
- What is the seam geometry?
- What is the roof material?
- What is the sheet thickness/gauge?
- How is the roof connected to the supporting structure?
A clear roof photograph is useful, but a profile drawing or measured section is much better.
3. Physical Fit Is Not Engineering Qualification
This is one of the most important distinctions in standing seam attachment.
A clamp may physically engage a seam without having structural qualification for that particular roof profile.
For example, two profiles may have a similar seam height but different:
- locking geometry;
- seam stiffness;
- material thickness;
- contact area;
- local deformation behavior.
The clamp interface therefore matters.
Physical compatibility answers “Can I install it?”
It does not automatically answer:
“Is this configuration structurally qualified?”
The evidence package should be as close as reasonably possible to the actual roof configuration.
A practical evidence hierarchy is:
| Evidence level | Example | Confidence for project use |
|---|---|---|
| 1 — Exact configuration | Test/calculation for the actual roof profile, material, thickness and clamp | Highest |
| 2 — Representative configuration | Test on a representative profile with documented similarity | Requires engineering judgment |
| 3 — Product documentation | Manufacturer compatibility/application information | Useful for selection, but limited |
| 4 — General marketing statement | “Fits most standing seam roofs” | Not sufficient for structural qualification |
The closer the evidence is to the actual roof assembly, the less assumption is required.
4. Does Roof Thickness or Gauge Matter?
Yes.
Roof material and thickness are engineering variables, not merely descriptive information.
The seam has to transfer the PV loads into the roof structure. Depending on the connection, local seam deformation, yielding, denting, seam opening or other local failure can become more critical than deformation of the clamp itself.
This is why a clamp tested on one roof profile should not automatically be treated as having the same performance on another profile simply because both roofs are described as “standing seam.”
A proper evaluation should consider at least:
- profile geometry;
- material;
- thickness/gauge;
- clamp geometry;
- contact area;
- installation condition;
- load direction.
Where the roof manufacturer or profile is known, that information should normally be included in the engineering review.
5. How Much Load Can a Standing Seam Clamp Hold?
There is no reliable universal load rating for a standing seam clamp independent of the roof configuration.
A published clamp value only has meaning when its test or calculation basis is understood.
For example, a result may depend on:
- the tested roof profile;
- roof material and thickness;
- clamp model;
- clamp position;
- installation torque;
- rail connection;
- load direction;
- test setup;
- governing failure mode.
A useful test report should therefore tell you more than the final peak load. At minimum, look for:
- what roof profile was tested;
- material and thickness;
- clamp configuration;
- load direction;
- test setup;
- installation condition;
- observed failure mode.
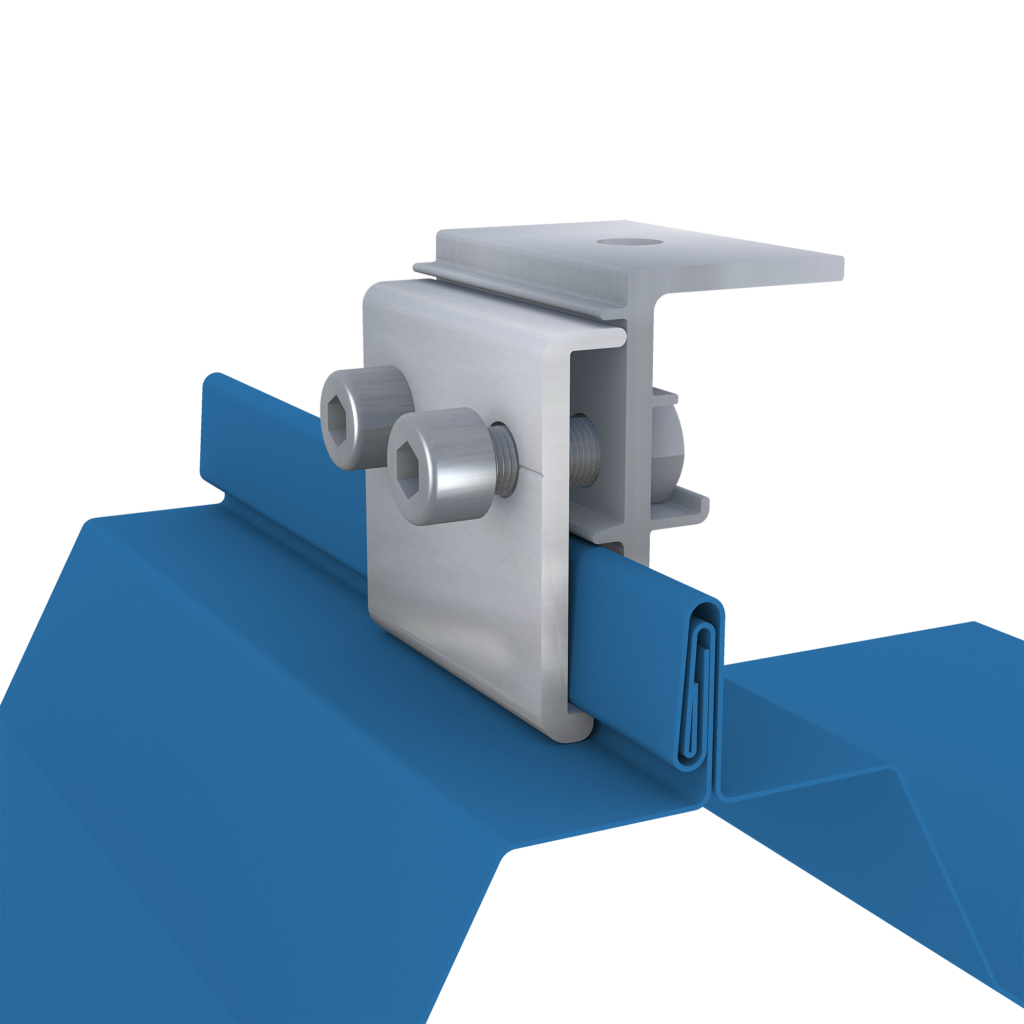
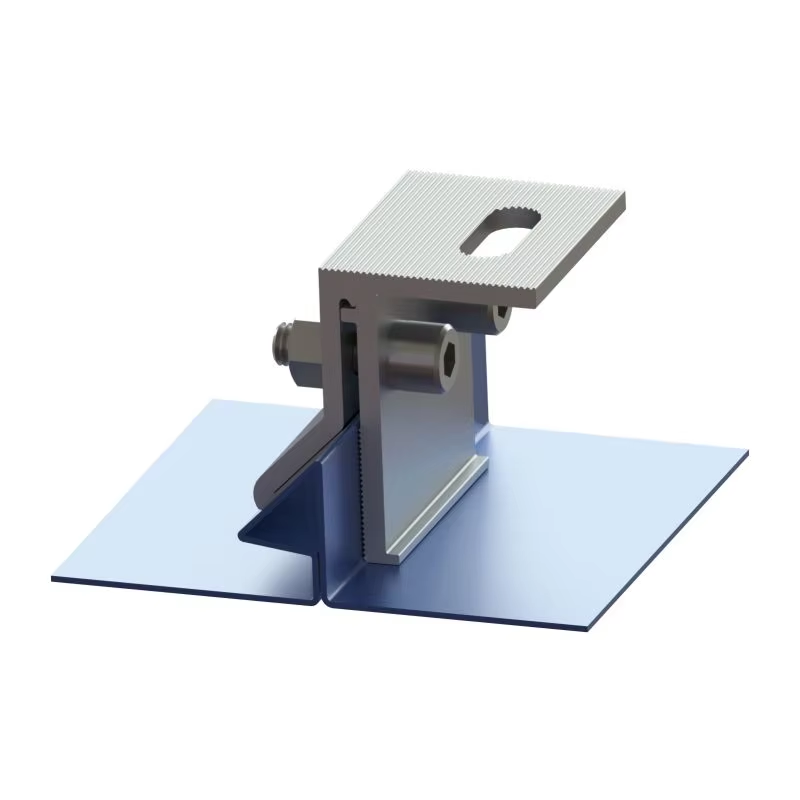
Test value is not automatically design value
This distinction is frequently missed. A laboratory test result is evidence for a defined configuration. It is not automatically the design resistance to use in every project.
Moving from a test result to a project design value may require consideration of:
- the relevance of the tested configuration;
- the applicable design methodology;
- safety factors;
- statistical treatment where required;
- load combinations;
- project-specific installation conditions.
Therefore: Test load ≠ project design load ≠ complete PV system capacity
These three numbers should not be casually substituted for one another.
6. Load Direction Matters
Standing seam attachments do not necessarily experience one simple type of loading.
Depending on the roof and mounting arrangement, the attachment may experience combinations of:
- wind uplift;
- downward wind pressure;
- dead load;
- snow;
- maintenance or other applicable loads;
- seismic effects where relevant.
The governing direction may also change with the project.
For example, an attachment that performs well in one loading direction should not automatically be assumed to have equivalent resistance in another.
This is one reason a useful test report identifies the direction and method of loading rather than simply stating a single “maximum load.”
7. Look at the Roof Clips Under the Seam
A non-penetrating clamp does not mean that the visible seam is the entire structural system.
The load may continue from the seam into the roof clips and then into the purlins or structural framing.
A simplified load path is:
PV array → rail → standing seam clamp → seam → roof panel → roof clip → purlin/structure
This creates an important engineering boundary:
A strong clamp does not compensate for a weak roof load path.
The project assessment may therefore need information about:
- roof clip type;
- clip spacing;
- purlin spacing;
- supporting structure;
- roof panel construction;
- roof zone;
- wind and snow design loads.
For larger commercial or industrial roofs, this part of the assessment can be more important than the nominal strength of the clamp body.
8. Standing Seam Roofs Can Move
Standing seam systems are often designed with thermal movement in mind.
PV mounting should therefore consider the interaction between:
- roof movement;
- clamp location;
- rail movement;
- fixed and sliding connections;
- differential thermal expansion.
The objective is not simply to make the PV array rigid.
The attachment arrangement should be compatible with the movement behavior of the roof system.
A non-penetrating clamp can reduce direct roof-penetration issues, but it does not eliminate structural or movement-related design considerations.
9. Non-Penetrating Does Not Mean Risk-Free
One reason standing seam clamps are attractive is that they can attach to the roof without conventional penetration of the roof sheet.
That can reduce the direct waterproofing risk associated with creating new penetrations.
But the engineering questions do not disappear. You still need to establish:
- whether the clamp fits the seam;
- whether the seam can transfer the required loads;
- whether the roof clips and supporting structure can carry those loads;
- whether the attachment is compatible with roof movement;
- whether the roof manufacturer’s requirements or warranty conditions are satisfied.
A useful distinction is: No penetration changes the waterproofing risk. It does not remove the structural risk
10. What Evidence Should You Ask a Supplier For?
For a project-specific standing seam attachment, I would normally ask for more than a product catalogue page.
Useful documentation can include:
Product information
- clamp drawing;
- dimensions;
- material;
- finish/coating;
- compatible seam profiles;
- installation instructions;
- fastener information;
- specified installation torque where applicable.
Structural evidence
- test report;
- test configuration;
- tested roof profile;
- material and thickness;
- loading direction;
- failure mode;
- test laboratory;
- engineering calculation where available.
System information
- compatible rail;
- rail connection;
- module arrangement;
- attachment spacing;
- roof-zone assumptions;
- applicable design loads.
The purpose is not to collect documents for their own sake.
The question is:
Does the available evidence actually represent the configuration being designed?
11. What About UL 2703?
UL 2703 is relevant to PV mounting systems, mounting devices, clamping/retention devices and ground lugs used with flat-plate PV modules and panels. UL Solutions also explains that the standard can address mechanical loading, bonding/grounding and rooftop fire classification within defined configurations.
However, “UL 2703 compliant” is not enough information by itself.
UL’s own guidance specifically states that plan reviewers should verify the actual certification/listing and its parameters, because a particular product may be evaluated for specific functions and specific PV modules, mounting structures or configurations.
That means the useful question is not:
“Does this clamp have UL 2703?”
It is:
“What exactly is covered by the UL 2703 listing, and does that scope match the proposed installation?”
For projects requiring UL certification, verify the actual listing rather than relying on a statement in a supplier quotation.
UL Solutions — PV Mounting Systems Certification
UL Product iQ — Certification Database
For broader PV array design requirements, the current IEC publication should also be checked against the project jurisdiction and applicable code. IEC currently lists the consolidated IEC 62548-1:2023+AMD1:2025 publication.
12. A Practical Standing Seam Clamp Selection Process
A useful selection process is:
Step 1 — Identify the roof
Obtain:
- manufacturer;
- profile;
- roof material;
- thickness/gauge;
- seam dimensions;
- roof drawings or photographs.
Step 2 — Check physical compatibility
Confirm that the clamp geometry actually engages the seam as intended.
Step 3 — Check qualification evidence
Look for testing, engineering calculations or documented manufacturer application data relevant to the actual or representative roof configuration.
Step 4 — Establish the load path
Do not stop at the clamp.
Check:
clamp → seam → roof panel → roof clip → purlin/structure
Step 5 — Check project loads
At minimum, establish the relevant:
- wind;
- snow;
- seismic, where applicable;
- dead load;
- roof-zone effects;
- array geometry.
Step 6 — Check movement and installation requirements
Confirm:
- fixed/sliding arrangement;
- clamp location;
- installation torque;
- rail interface;
- roof manufacturer’s requirements.
Step 7 — Confirm documentation before ordering
The final purchasing specification should identify the actual roof configuration and required evidence rather than simply saying:
“Standing seam clamp.”
13. What Information Should You Send for an RFQ?
If you want a supplier to select or qualify a standing seam clamp properly, send as much of the following as is available.
Roof
- Roof manufacturer
- Exact profile/model
- Roof material
- Sheet thickness/gauge
- Seam width
- Seam height
- Seam cross-section or drawing
- Roof pitch
- Roof panel length where relevant
- Roof clip information
- Purlin/rafter spacing
- Roof photographs
Project
- Project country/location
- Applicable design code
- Design wind load or wind speed
- Snow load
- Seismic requirements where applicable
- Roof zone
- Array dimensions/layout
- Module orientation
- Proposed attachment spacing
PV mounting system
- Module manufacturer/model
- Module dimensions
- Rail manufacturer/model
- Rail cross-section
- Proposed clamp model, if already selected
- Required bonding/grounding
- Certification requirements
Procurement
- Quantity
- Target market
- Required documentation
- Sample requirement
- Delivery requirement
- OEM/custom requirement
- Packaging requirements
If some of these data are unavailable, say so.
A good supplier should be able to tell you which missing information prevents a reliable qualification, rather than simply returning a generic clamp quotation.
14. Common Standing Seam Clamp Selection Mistakes
Mistake 1: Selecting by roof name
“Standing seam roof” is not enough to establish compatibility.
Mistake 2: Assuming physical fit means structural approval
A clamp that can be installed is not necessarily qualified for the roof.
Mistake 3: Asking only for the clamp’s maximum load
The relevant failure may occur in the seam, roof panel, roof clip, rail or structure.
Mistake 4: Treating a test result as the project design value
Test configuration and project design conditions must be considered separately.
Mistake 5: Ignoring the roof clips
The seam is part of a larger structural load path.
Mistake 6: Ignoring roof movement
A rigid PV attachment can interact with a roof system that was designed to accommodate thermal movement.
Mistake 7: Accepting “UL 2703 compliant” without checking the listing
The actual certification scope and installation conditions matter.
15. Standing Seam Clamp Selection Checklist
Before approving a clamp, ask:
Roof identification
- Manufacturer identified
- Exact profile identified
- Seam geometry known
- Material known
- Thickness/gauge known
Compatibility
- Clamp physically fits the seam
- Installation method confirmed
- Rail interface confirmed
Engineering
- Load direction considered
- Relevant wind/snow loads established
- Roof clip and supporting structure considered
- Governing failure mode identified
- Roof movement considered
Evidence
- Test or engineering evidence reviewed
- Tested configuration understood
- Test value not confused with design value
- Certification scope verified where required
Procurement
- Drawing/specification confirmed
- Material and finish confirmed
- Required documentation listed
- Sample required or not decided
- Quantity and delivery requirements confirmed
16. The Right Way to Specify a Standing Seam Clamp
A useful specification should identify the application, not just the component name.
Instead of:
Standing seam solar clamp, aluminum, 30 mm.
A project specification should be closer to:
Standing seam PV attachment clamp compatible with [roof manufacturer/profile], [roof material], [thickness], and the specified seam geometry; suitable for the project loading conditions and mounting configuration, with supporting test/engineering documentation and installation requirements provided.
The exact wording will depend on the project.
The important point is that the roof profile and engineering basis should remain visible in the specification.
17. When a Standard Clamp Is Not Enough
There are cases where a standard catalogue clamp is not the right answer.
This can happen when:
- the roof profile is uncommon;
- the seam geometry is proprietary;
- the roof material or thickness falls outside existing qualification;
- the required load is unusually high;
- the available clamp creates an unfavorable load path;
- the project requires specific certification;
- the roof manufacturer has specific attachment restrictions.
In these situations, the engineering question may shift from:
“Which standard clamp should I buy?”
to:
“What attachment geometry and evidence are required for this roof?”
That may lead to profile-specific testing, engineering calculation, or a custom clamp/interface rather than forcing a standard product into an unqualified application.
18. Need a Standing Seam Clamp Qualification?
If you are evaluating a standing seam clamp for a real project, the most useful starting information is:
roof manufacturer + profile + material + thickness/gauge + seam dimensions + project location + wind/snow requirements + module/rail information.
With those inputs, the selection process can move beyond catalogue compatibility and toward an actual engineering qualification.
For a supplier RFQ, the objective should not simply be to obtain a price.
It should be to establish:
the correct clamp → the correct roof interface → the correct evidence → the correct project application.
That is the difference between buying a clamp and qualifying a roof attachment.
Key References
- UL Solutions — PV Mounting Systems Certification
- UL Product iQ — Certification Database
- IEC 62548-1:2023+AMD1:2025
Standards and certification requirements vary by jurisdiction and project. The applicable code, roof manufacturer’s requirements, module documentation, test evidence and project-specific engineering should be reviewed before final system approval.